Showing posts with label Topsy Tail. Show all posts

Tuesday, July 20, 2010

Loops, Braids, & Ribbon....oh my!

For her first day of dance camp Aubrey wanted a
fancy  'do.
We combined Girly Do Hair Style's  For Kimberly 'do with Princess Hairstyle's  Patriotic Ribbon Cornrows and our own style. This is what we came up with.
To start, I braided a "X" on the top of her head and again on each side.
Then, divided the remaining hair into three ponies and attached the braids.
After that the ponies were made into loops using our Topsey Tail just like our  Super Easy Up 'Do . Lastly, the ribbon was added.
It actually was a pretty simple 'do and lasted through not only dance but the next day of YMCA camp too!


Tuesday, April 13, 2010

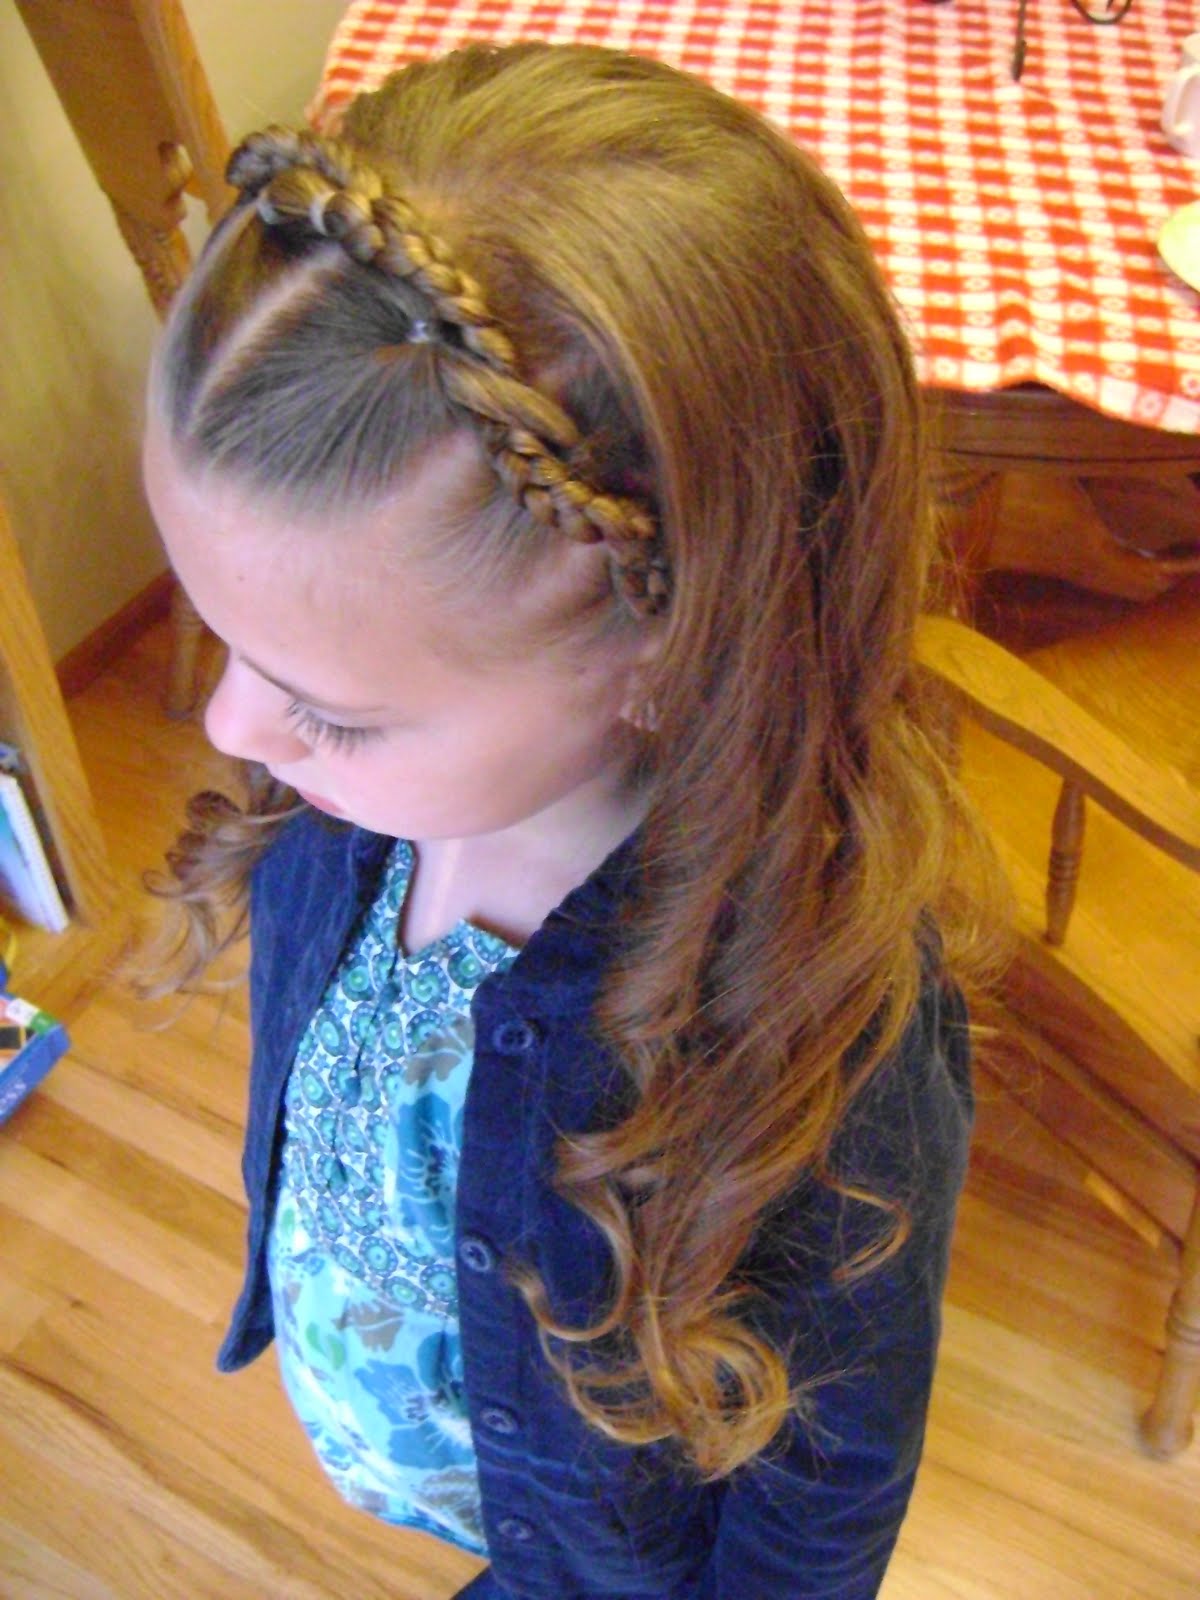
Double The Fun Braided Headband

Usually Aubrey's hair is in an updo style but today we were looking for something a little different. This is what we came up with.
To start, I sectioned out the front of her hair and pulled the rest into a pony. Then I parted that hair down the middle of her head and made puff braids on each side.
This is what the top of her head looked like:
Next, added an extra elastic to each side.
Using another elastic, loosely connected the two tails while crossed over each other.
Then, just braided each tail.
Next, I got out my trusty Topsey Tail and used it to weave the braided tails in and out of the puff braid. (sorry for the bad picture)
This is what it then looked like:
I took the ends of the braids and connected them using a clear elastic at the base of her head. If your working with shorter hair, you could make pigtails and just at the ends to them.
Curled the ends of her hair and we were good to go!
This was actually a really quick style! Curling her hair took longer than the rest of the 'do.
It also held up well through the entire weekend!


Wednesday, April 7, 2010

Libby Lu Inspired 'Do

Before they closed, Aubrey's FAVORITE store was Libby Lu. It has been over a year since they shut their doors yet she still talks about going there. Recently she found this flier that she had saved and asked if I would do her hair just like it.
I had picked up some faux neon hair ($3.99 each/ buy two get one free) on my last trip to Sally's.
To start, I pulled her wet hair into a pony using a clear elastic after sectioning out the front.
Inserted the hair piece and also secured it to the pony.
Added the front section to the pony while covering up the hair piece clip.
Inserted my trusty Topsey Tail.
And made a large loop just like in our post Super Easy Up 'Do~ two ways to wear it!
I divided the tail into two sections, making sure the colored hair from the hair piece was on the opposite side.
And pulled those around each side making another pouf with the Topsey Tail.
At this point I tucked and pinned the tails to cover the elastic and smoothed them into the style with gel.
This is how it turned out:
To dress it up for dance, I added a large flower.
Side view:
This was a quick 10 minute syle that held up well through an afternoon of playing outside and then an evening of dance!

Sunday, April 4, 2010

Happy Easter!

After seeing the Egg Tails post over at Adopt A 'Do, Aubrey was begging me to put easter eggs in her hair too! I combined that style along with Girly Do Hair Styles post Row of long knots AND the post by Sugar and Spice and all hair nice titled Pulled through and twisted out!
 I wasn't planning on posting this so I didn't take pictures for a tutorial but I thought it turned out so cute that I had to post it!
And of course we had to get a few pics with her bunny!
Happy Easter!

Thursday, April 1, 2010

Mohawk Deux


My camera was MIA during this style so I don't have step by step photos but it was pretty easy to do anyway. The evening before, I parted her hair down the middle, sectioned out bangs, and made climbers on each side of her head towards the middle part. Once they reached the middle of her head, I had a total of four ponies plus the bangs. The neon green bands we used kind of added to the rockstar look we were going for ;)


The next morning I used my trusty topsey tail to make poufs with the ponies just like in our post Super Easy Up 'Do ~Two ways to wear it! Then just rolled up the bangs section and pinned them. It turned out to be a fun and funky style!

I think using the topsey tail instead of rolling the hair like we did in our post Funky Faux Mohawk  makes this hawk easier. What do you think?

Wednesday, March 24, 2010

"X Marks the Spot" made easy

I am really busy this week so this is a quick post of my absolute favorite hairstyle.
I saw the "X" Marks the Spot post by Jenn over at Girly Do Hair Styles and fell in love with it immediately! The only problem; I really struggle with dutch braids. In order to pull off the look without the work, I began with seven rope braids. The top of each rope braid was started with a pull through using my trusty "topsey tail" to give it a more finished look.
I then gathered all her hair that was not included in the braids into a low pony and attached the rope braids to it. Everything after this point was the same that Jenn did~ laced it up with ribbon and made a messy bun. Since rope braids are fast and easy, this style actually didn't take that long. Aubrey wore this for the entire weekend and was still receiving compliments on Sunday.


Monday, March 15, 2010

Super Easy Up 'Do ~Two ways to wear it!

This is a quick and easy up 'do! It seriously took me 10 min.
total from start to finish and I was taking pictures too!

To start, I broke out my trusty "Topsy Tail" (bought for only $1 on ebay).
Then made a high side pony, secured with a clear elastic.

Next, the pony was divided into three.

One section was threaded through the topsy tail.

And pulled through under the pony.....

but not all the way,
just until a nice pouf formed.

This was continued with the other two sections on hair.
Depending on how long your girly's hair is, you may want to make more than
one pouf with each section. Aubrey's hair is waist length and I made a
total of three poufs with each section.

The ends were then tucked in with pins.


We added her dance flower clip because she was
having costume pictures taken this afternoon.

After pictures, we spent a few hours at an indoor playground.
This style held up through the entire day!!!

The next day I used the same technique but instead of one pony to start
out with, I put in three. This is the result:


Aubrey's hair is thick so we were able to pull off the look with
three ponies. If you are working with hair on the thinner side,
I would recommend just one pony.

Hope you have as much fun with this style as we did!!!