Tuesday, April 13, 2010

Double The Fun Braided Headband

Usually Aubrey's hair is in an updo style but today we were looking for something a little different. This is what we came up with.
To start, I sectioned out the front of her hair and pulled the rest into a pony. Then I parted that hair down the middle of her head and made puff braids on each side.
This is what the top of her head looked like:
Next, added an extra elastic to each side.
Using another elastic, loosely connected the two tails while crossed over each other.
Then, just braided each tail.
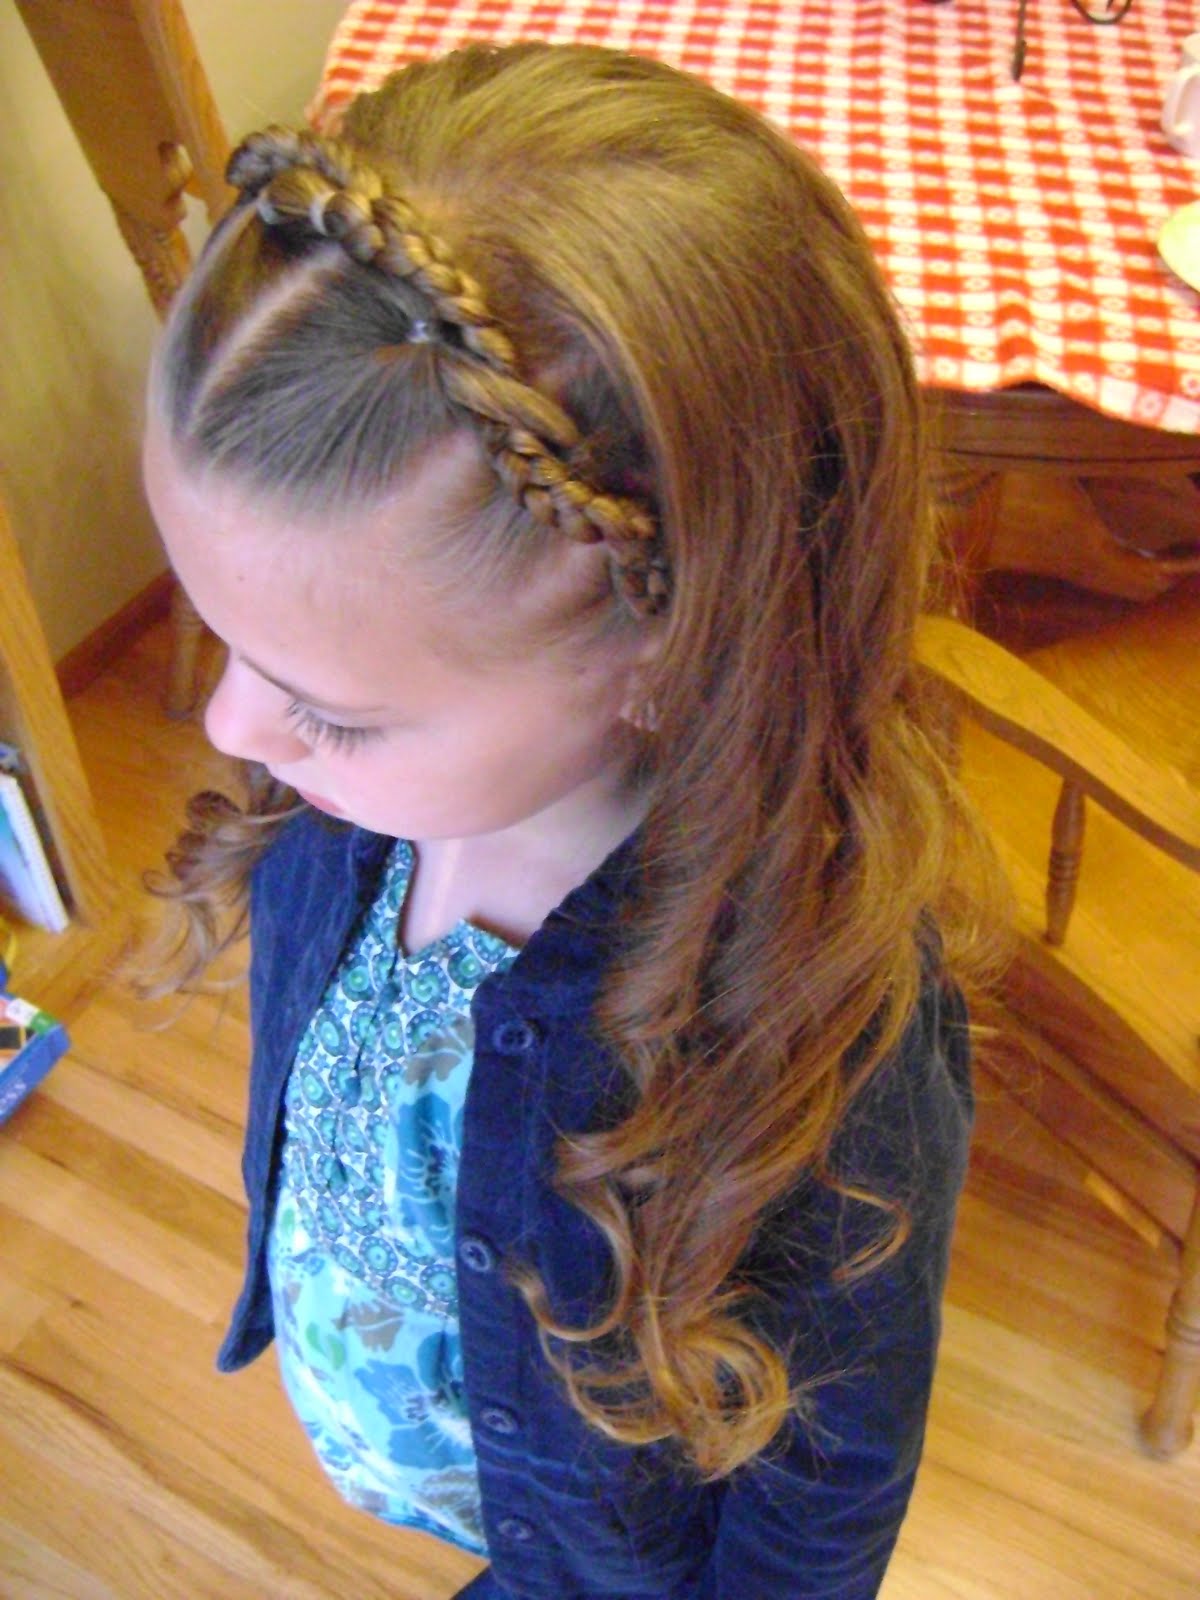
Next, I got out my trusty Topsey Tail and used it to weave the braided tails in and out of the puff braid. (sorry for the bad picture)
This is what it then looked like:
I took the ends of the braids and connected them using a clear elastic at the base of her head. If your working with shorter hair, you could make pigtails and just at the ends to them.
Curled the ends of her hair and we were good to go!
This was actually a really quick style! Curling her hair took longer than the rest of the 'do.
It also held up well through the entire weekend!


Wednesday, April 7, 2010

Libby Lu Inspired 'Do

Before they closed, Aubrey's FAVORITE store was Libby Lu. It has been over a year since they shut their doors yet she still talks about going there. Recently she found this flier that she had saved and asked if I would do her hair just like it.
I had picked up some faux neon hair ($3.99 each/ buy two get one free) on my last trip to Sally's.
To start, I pulled her wet hair into a pony using a clear elastic after sectioning out the front.
Inserted the hair piece and also secured it to the pony.
Added the front section to the pony while covering up the hair piece clip.
Inserted my trusty Topsey Tail.
And made a large loop just like in our post Super Easy Up 'Do~ two ways to wear it!
I divided the tail into two sections, making sure the colored hair from the hair piece was on the opposite side.
And pulled those around each side making another pouf with the Topsey Tail.
At this point I tucked and pinned the tails to cover the elastic and smoothed them into the style with gel.
This is how it turned out:
To dress it up for dance, I added a large flower.
Side view:
This was a quick 10 minute syle that held up well through an afternoon of playing outside and then an evening of dance!

Sunday, April 4, 2010

Happy Easter!

After seeing the Egg Tails post over at Adopt A 'Do, Aubrey was begging me to put easter eggs in her hair too! I combined that style along with Girly Do Hair Styles post Row of long knots AND the post by Sugar and Spice and all hair nice titled Pulled through and twisted out!
 I wasn't planning on posting this so I didn't take pictures for a tutorial but I thought it turned out so cute that I had to post it!
And of course we had to get a few pics with her bunny!
Happy Easter!

Thursday, April 1, 2010

Mohawk Deux


My camera was MIA during this style so I don't have step by step photos but it was pretty easy to do anyway. The evening before, I parted her hair down the middle, sectioned out bangs, and made climbers on each side of her head towards the middle part. Once they reached the middle of her head, I had a total of four ponies plus the bangs. The neon green bands we used kind of added to the rockstar look we were going for ;)


The next morning I used my trusty topsey tail to make poufs with the ponies just like in our post Super Easy Up 'Do ~Two ways to wear it! Then just rolled up the bangs section and pinned them. It turned out to be a fun and funky style!

I think using the topsey tail instead of rolling the hair like we did in our post Funky Faux Mohawk  makes this hawk easier. What do you think?

Tuesday, March 30, 2010

Dressed Up Ballerina Bun

We came up with this cute 'do for dance class!


To start, first I pulled her hair back into a pony tail and then made a sock bun just like in our post Quick and Easy Barbie Bun


I wrapped her hair around the base of the bun and pinned it into place.


Got out my plastic craft needle and ribbon.


And began sewing the ribbon around the bun. The ribbon really helped to hold it into place. **I found it worked best to sew going into the middle of the bun and come out the sides.


At this point I wrabbed and tied a wider ribbon around the base.


You could just tie that ribbon into a bow and leave the ends hanging down. I happen to have a large matching clip.


Then I snipped the ends of the ribbon.

I added a little gel and hairspray to make sure that it lasted through a day of school and then dance class!


I think it also would look cute if you made "X's" with the ribbon around the bun.

Total time~ 10 minutes!